Tools
Apart from the w3af core functionality, that is to scan for vulnerabilities and exploit them, there are other tools that help you in the day by day work.
Manual Requests
This tool lets you write and send HTTP requests.
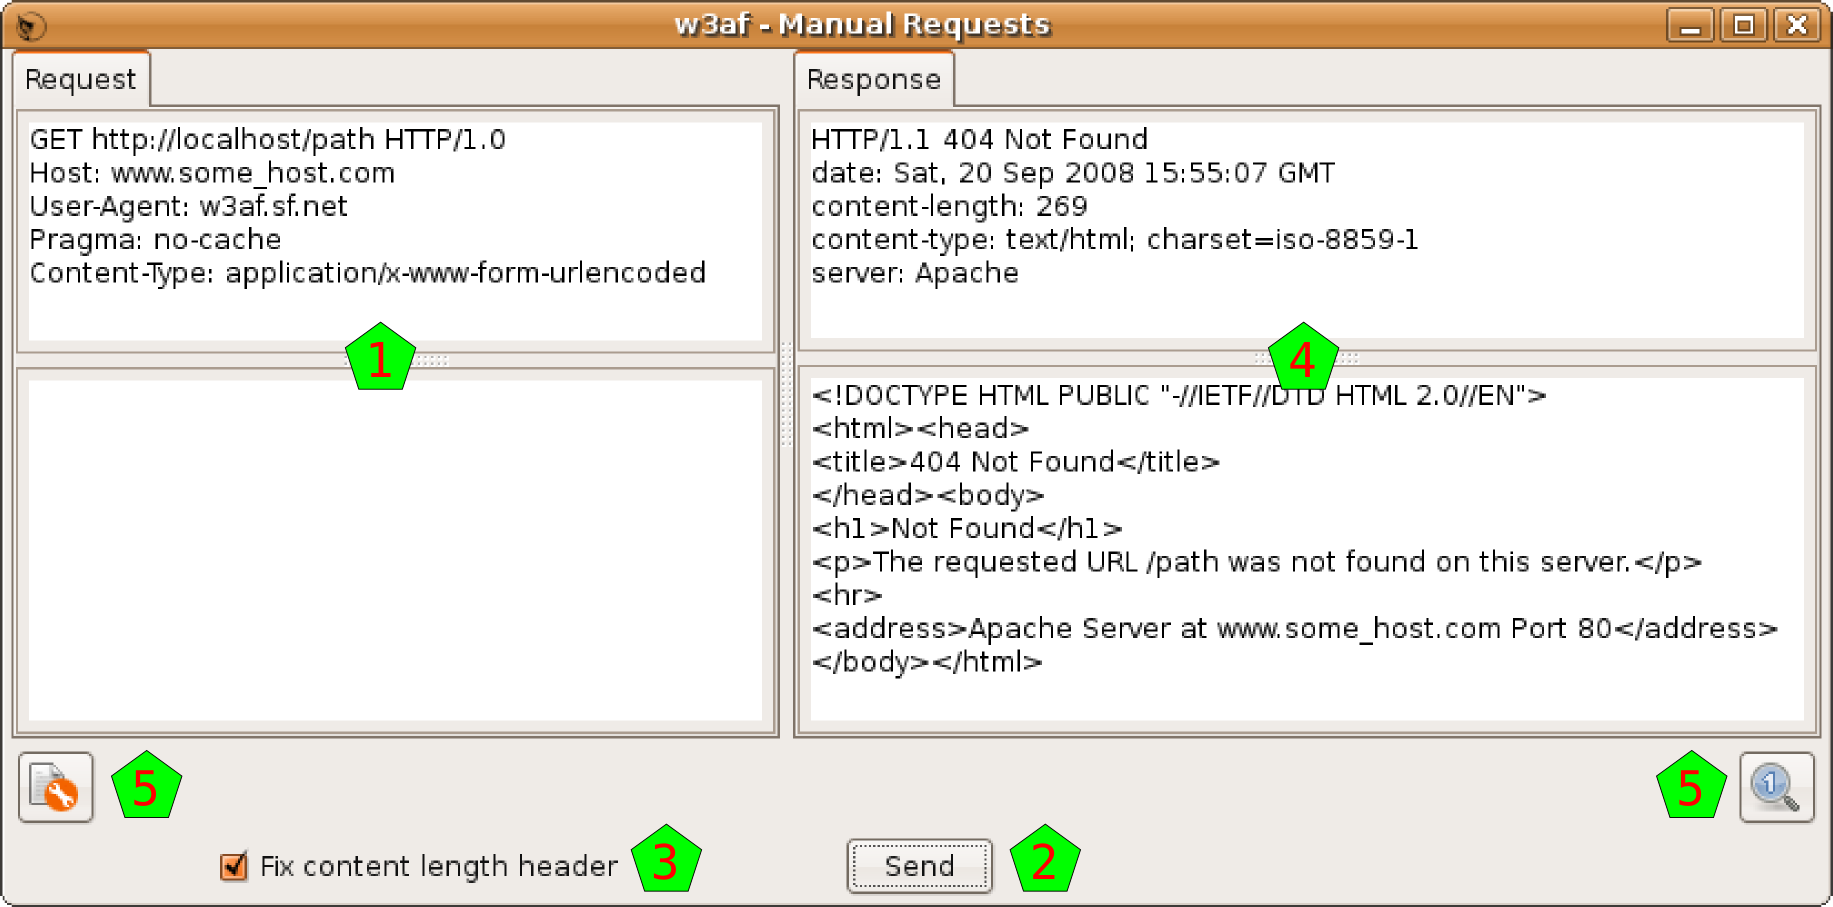
When opening the tool you will find the typical four panes window for HTTP requests and responses. In this case you’ll find only active the request part [1], filled with an example request (if you opened this tool from the toolbar) or with a request that you may brought from another part of the program (using the small button under other requests, as is explained above).
You can edit the request, not only the headers part but also the body of the HTTP request, and when ready, click on the Send button [2] to issue that manually crafted request. Note that you can check the Fix length header button if you want the system to correct the Length header in the request that is sending (which lets you modify the request without fixing that header every time).
The system will issue the request and put the response (headers and body) in the right part [4].
Also you have the normal send data to tools buttons in the usual places [5].
Fuzzy Requests
This tool lets you create multiple HTTP requests in an easy and controllable way.
The part of building the HTTP request is pretty similar to the manual request, as you have also panes for the headers and the body [1], but using a special syntax you can create what is called a Fuzzy Request, which is actually a request that is expanded to multiple ones. You have a quick helper for this syntax in that very window [2], but here it is explained in detail.
When you create a request, all the text is sent as is to the destination,
except those that are inside two dollar signs $. This text is used by
the system to create a text generator, that it will consumed creating the
multiple requests (they’re called fuzzy generators). If you don’t put any double
dollar signs, it will be exactly the same as if you used the Manual Request
tool. If you actually want to include a dollar sign in the request, just use \$.
But if you put a text between two dollar signs that generates three items, you will actually creating three requests, and you will get three responses at the right. You can put as many fuzzy generators as you want, and the system will create multiple requests using all the possible combinations. So, if you keep the first generator (that generated three items), and insert a new one that generates, say, five items, the system will create fifteen requests (3 x 5 = 15).
The system will generate the different items using the text between the dollar
signs as a Python statement, using directly eval(), with an almost clean
namespace (there’s only the already imported string module). There’s no security
mechanism in this evaluation, but there’s no risks as the evaluated text is only
between the dollar signs, and you’re responsible about that. Using this
evaluation, for example, you could do:
- Numbers from 0 to 4:
$range(5)$- First ten letters:
$string.lowercase[:10]$- The words spam and eggs:
$['spam', 'eggs']$- The content of a file:
$[l.strip() for l in file('input.txt')]$
You can actually check how many request the system will generate, using the Analyze button [3]. Just clicking on it the indicator at its right will be updated to this value. Also, if you check the Preview checkbox [4], the system will generate the different requests, and will show you them in a new pop up window.
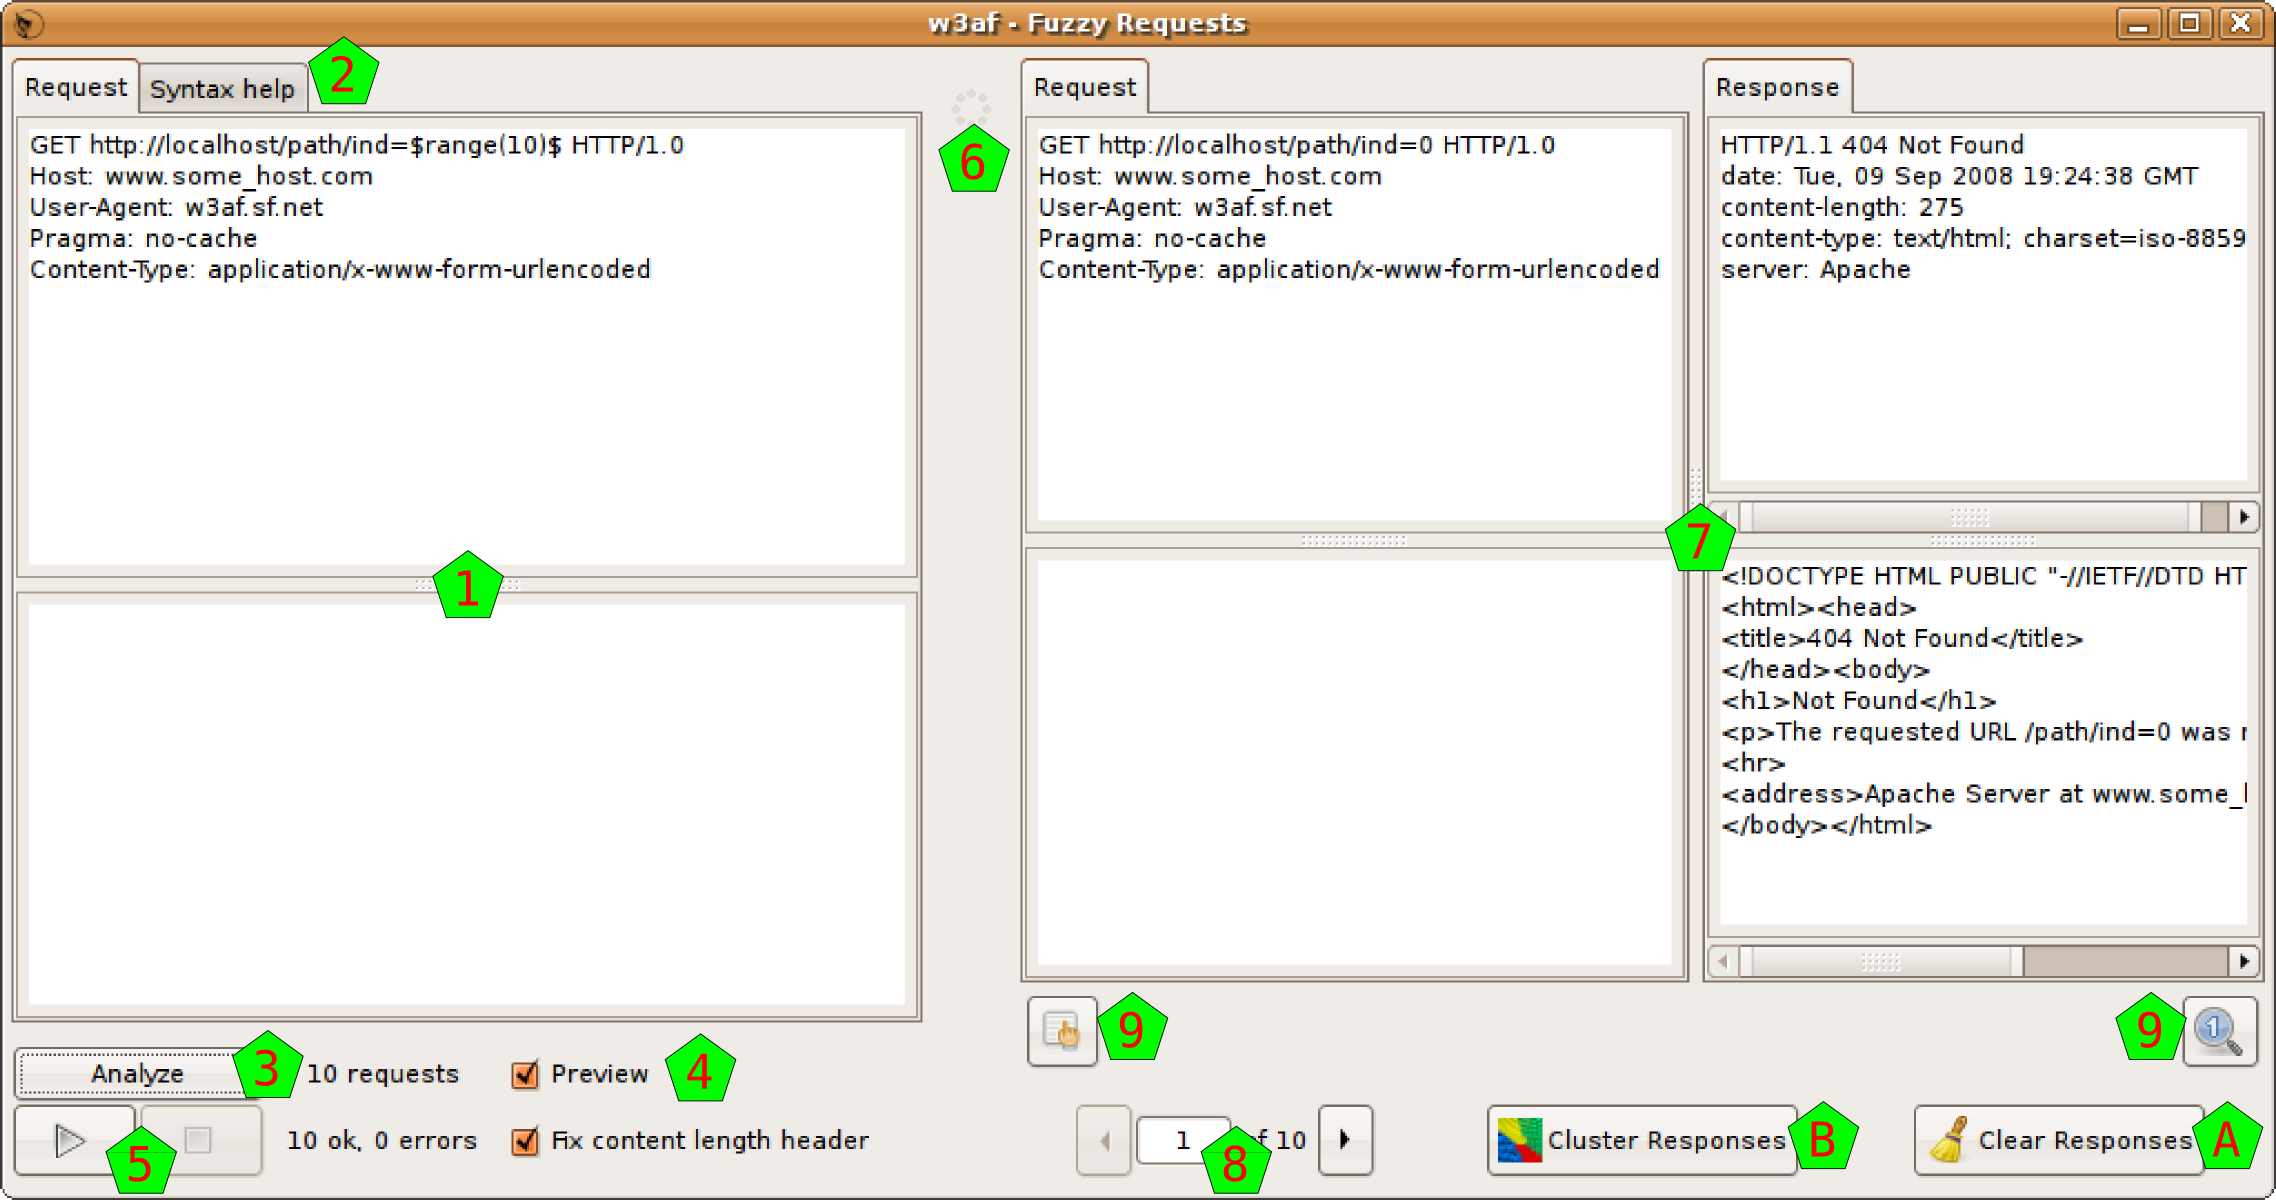
When you’re ready to actually send the generated requests, you can use the Play and Stop buttons [5], which will let you start, stop, and even pause the generated requests of being sent (the Play button will mutate to a Pause one when the system is sending the requests). Also, another indicator that the system is working is the throbber [6].
The system will show all the responses (even as they’re being generated) in the classic four pane arrangement [7]: the request that was actually sent (not the fuzzy request, but one of the generated ones, with the text between the $ replaced), and the response to that specific request. Of course, the system will not show you all the requests at once, but you have a control [8] that lets you see any of the generated request/response (using the arrows, or you’re even able to just enter the number that you want to see).
Beyond the standard tool buttons [9] to send the request and/or response to the Manual Request tool or the Compare tool, you have a Clear Responses button [A] that will erase all the results, and a Cluster Responses one [B] that will send all the responses to the Cluster tool (note that this tool is only accessible through here, as it only has sense to use it from multiple generated responses).
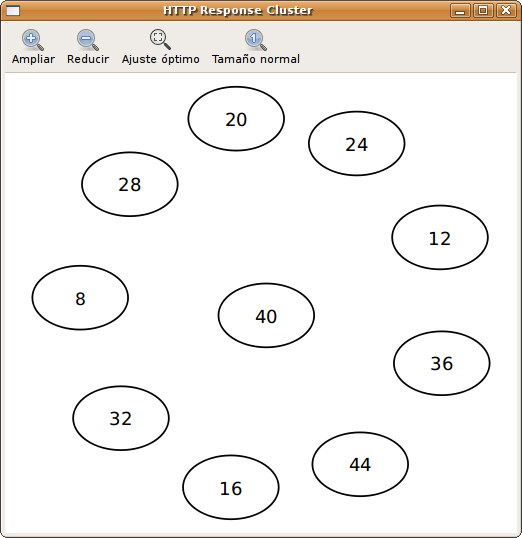
The Cluster Responses tool lets you analyze all the responses seeing graphically how different they’re between themselves. The graph will show you the responses, and the distance between them, grouping for a better analysis.
Also you have different buttons that help you to see the graph better: zoom in, zoom out, fit all the graph in the window, and show the graph in the original size.
Encode and Decode
This tool allows you to apply a lot of encoding and decoding functions in the text that you want.
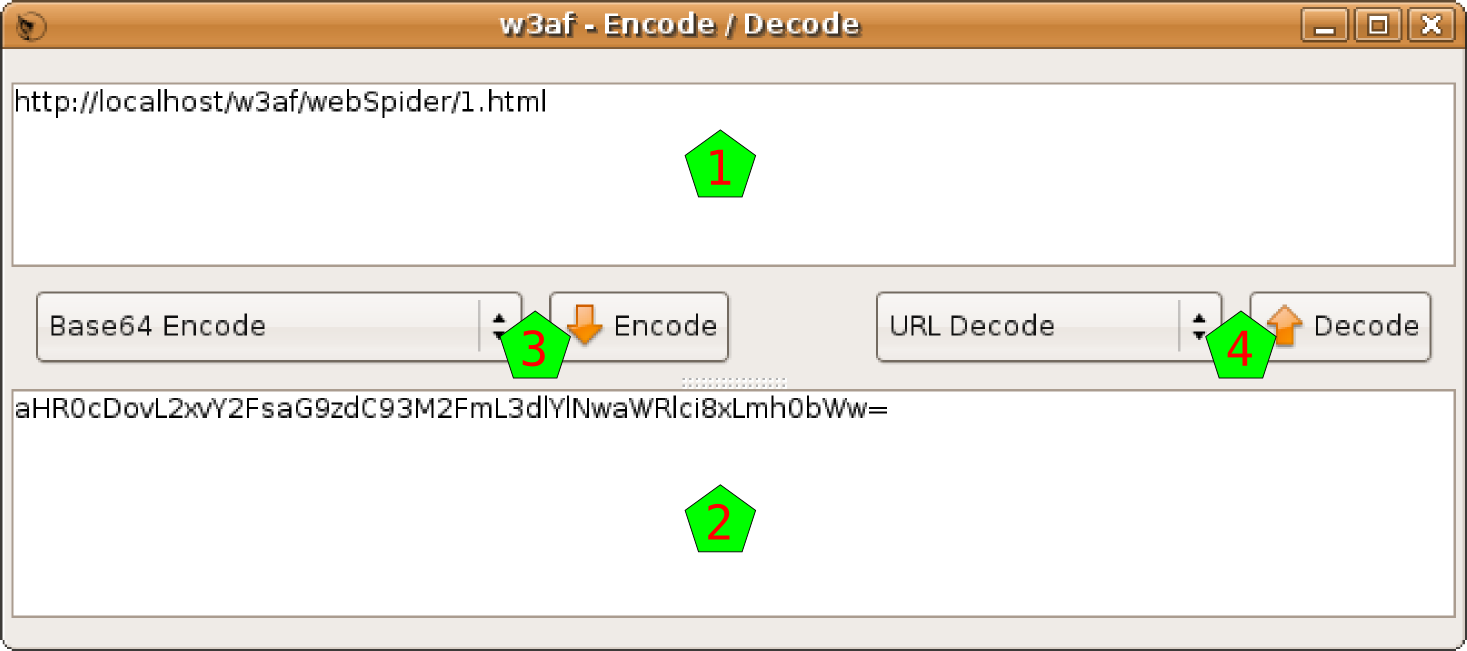
You have two panes where you can insert the text you want; put the text to Encode in the upper pane [1], and when encoded it will appear in the lower pane [2], and viceversa: to decode something put the text in the lower pane and after decoding it will appear in the upper pane.
To apply an encode, choose it from the encoding functions [3], and click on the Encode button. To apply a decode, choose it from the decoding functions [4], and click on the Decode button.
You have the following encoding and decoding functions:
- 0xFFFF Encoding: 0x encoding method
- Base64 Encode / Decode: Encode and decode using Base64
- Double Nibble Hex Encoding: This is based on the standard hex encoding method. Each hexadecimal nibble value is encoded using the standard hex encoding
- Double Percent Hex Encoding: This is based on the normal method of hex encoding. The percent is encoded using hex encoding followed by the hexadecimal byte value to be encoded
- Double URL Encode / Decode: Encode and decode doing Double URL Encode
- First Nibble Hex Encoding: This is very similar to double nibble hex encoding. The difference is that only the first nibble is encoded
- HTML Escape / Unescape: Encode and decode doing HTML escaping
- Hex Encoding / Decoding: This is one of the RFC compliant ways for encoding a URL. It is also the simplest method of encoding a URL. The encoding method consists of escaping a hexadecimal byte value for the encoded character with a %
- MD5 Hash: Encode using MD5
- MS SQL Encode: Convert the text to a CHAR-like MS SQL command
- Microsoft %U Encoding: This presents a different way to encode Unicode code point values up to 65535 (or two bytes). The format is simple; %U precedes 4 hexadecimal nibble values that represent the Unicode code point value
- MySQL Encode: Convert the text to a CHAR-like MySQL command
- Random Lowercase: Change random chars of the string to lower case
- Random Uppercase: Change random chars of the string to upper case
- SHA1 Hash: Encode using SHA1
- Second Nibble Hex Encoding: This is very similar to double nibble hex encoding. The difference is that only the second nibble is encoded
- URL Encode / Decode: Encode and decode doing URL Encode
- UTF-8 Barebyte Encoding: Just a normal UTF-8 encoding
- UTF-8 Encoding: Just that. Note that the hexadecimal values are shown with a %
Comparing HTTP traffic
With this tool you will be able to compare different requests and responses.
The Comparator window is separated mainly in two panes: both request and responses that you’re comparing. In this tool all the information is concatenated in the same text, to ease the comparison, but you have four buttons [1] to control which part of the information appear in the text: request headers, request body, response headers, and response body.
The comparison itself is done between the request/response at the left [2], and whatever request/response you have at the right [3]. This tool is prepared to handle more than two requests/responses: you always will have one request/response at the left, and all the requests/responses that you added at the right. To see exactly what you’re comparing, the system shows you each id [4].
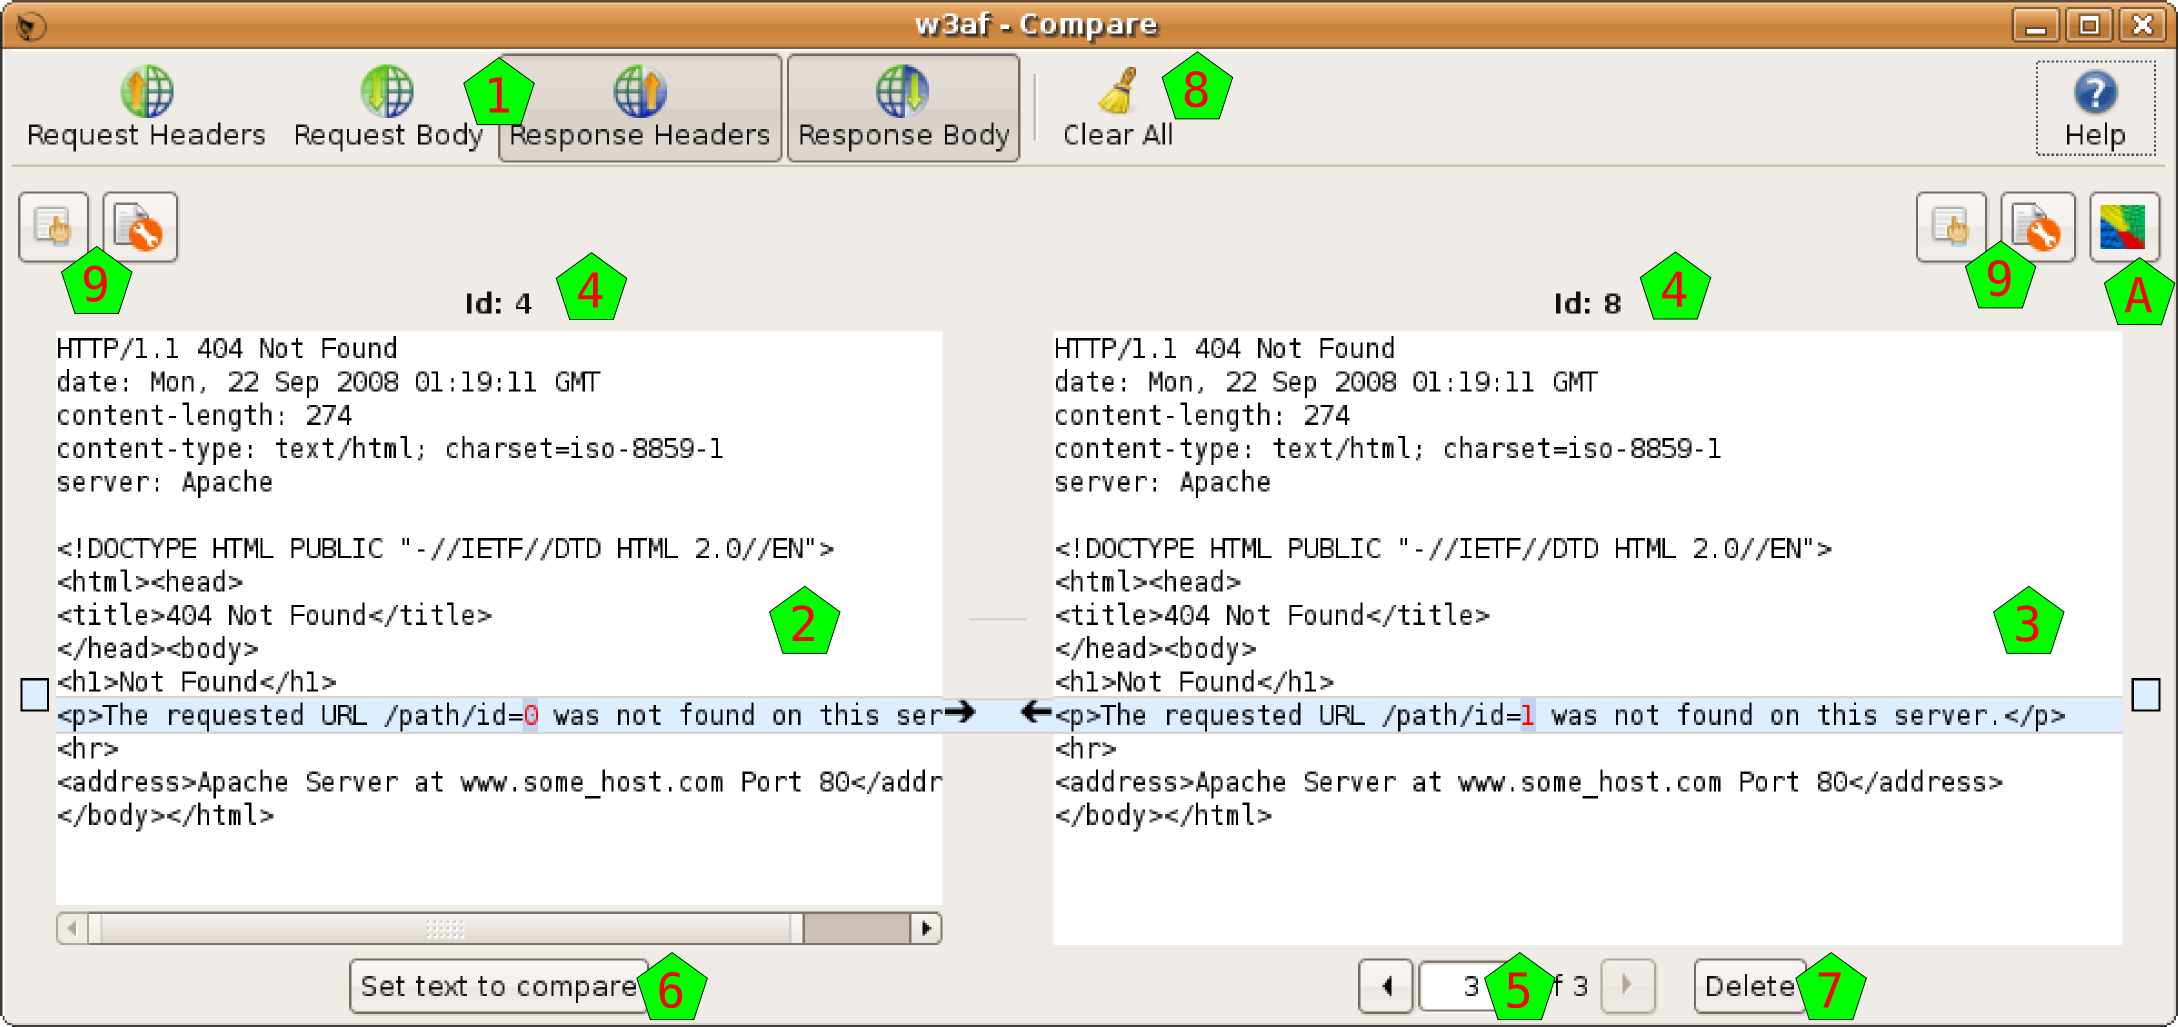
You have a control [5] to select which of the requests/responses that you added will compare to the one at the right. If you want to change the request/response that is at the left (the one that you compare to), you can set it using the Set text to compare button [6]. You can delete any of the requests/responses at the right using the Delete button [7], or delete them all with the Clear All one [8].
The requests can also sent from this tool to the Manual Requests or Fuzzy Requests ones, using the buttons above the texts [9]. There’s also a button [A] to send all the responses at the right to the Cluster Responses tool.
Using the Proxy
This tool is a proxy that listen to a port in the machine you’re running the w3af program. You can configure any program that issues HTTP request (like your internet browser, for example) to use this proxy.
When this other program issues the request, the proxy captures it and shows it to you [1]. You can choose to drop this request, using the Drop button [2], or let the request continue. If you choose the latter, you can edit the request as you want, and then click on the Send button [3].
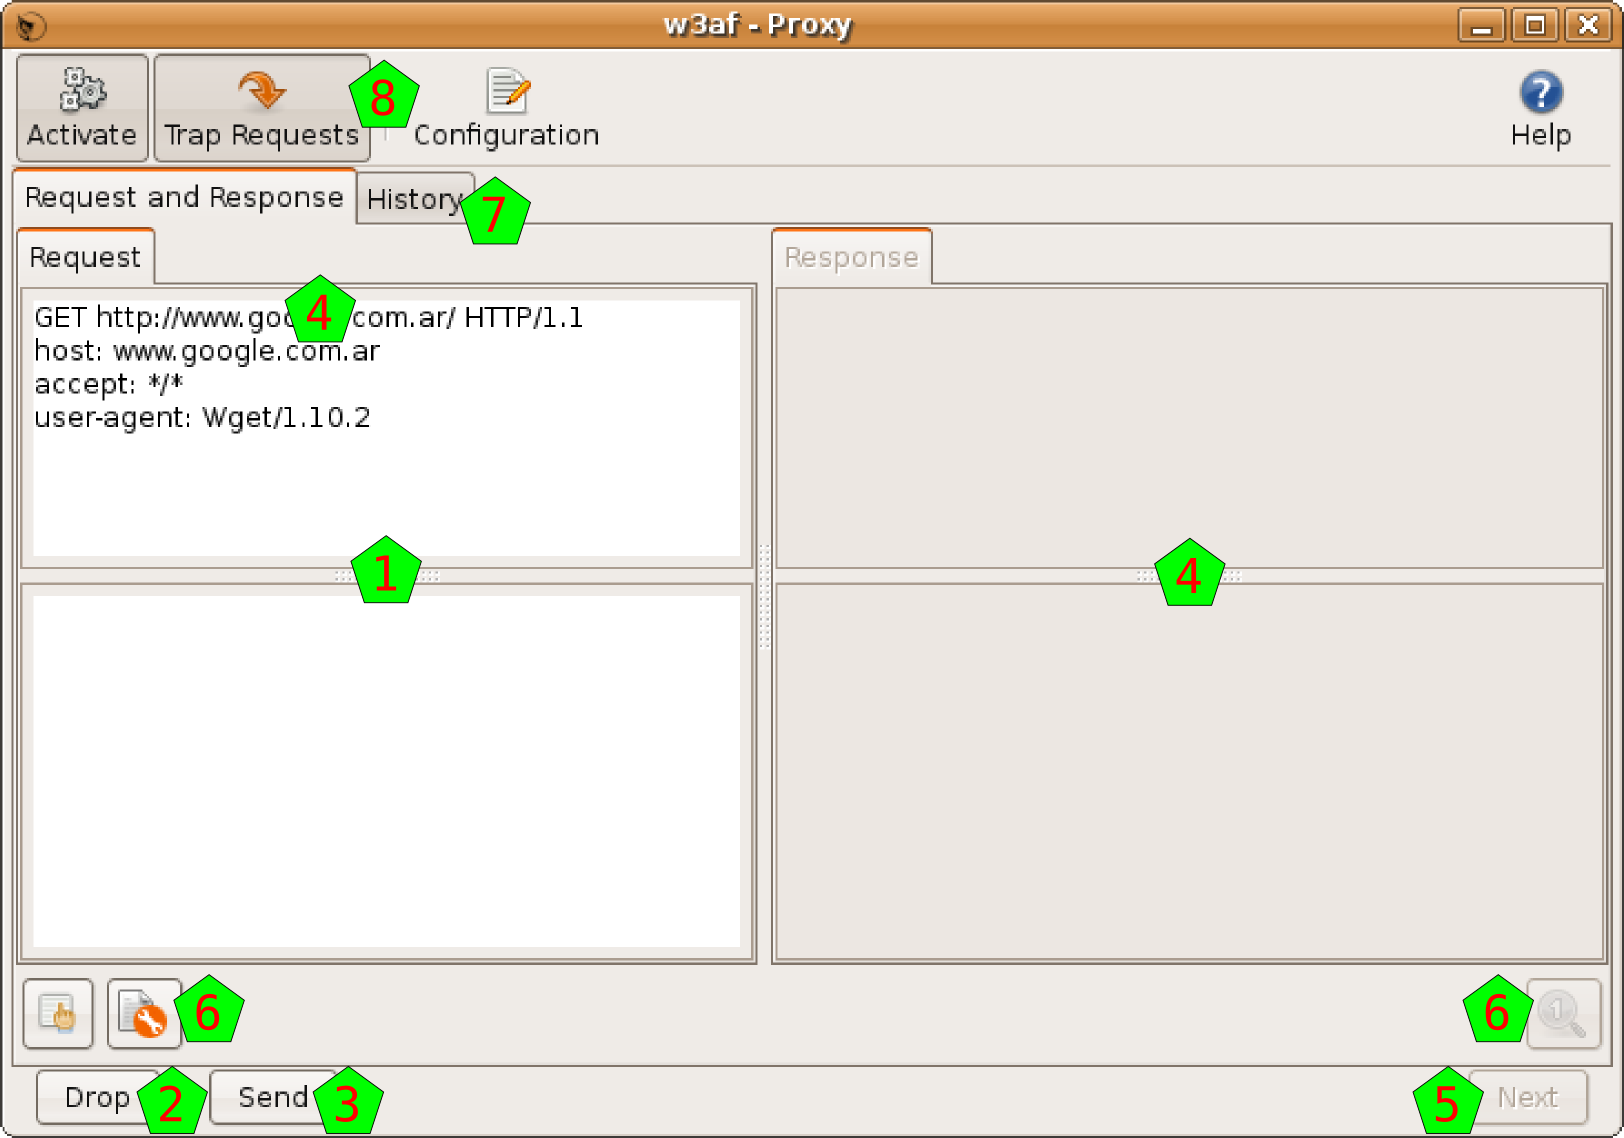
So the system will send the request, and catch the response when arrives, and will show it to you at the right pane [4]. After analyzing the response, you can click on the Next button [5], and the system will pass the response to the other program, and prepare itself to catch the next HTTP request.
As usual when working with HTTP requests and responses you have some buttons [6] to send that information to other tools. Also you have a History pane [7] that let you search on all the requests and responses (for help about this window, check chapter 4.3 on this documentation, as it’s the very same interface).
In the toolbar [8] of this window you have a Activate button that controls if the proxy is activated or not, a Trap Request button that will determine if the proxy is letting the request pass through without the procedure explained above, and a Configuration button (see chapter 7.4 for help about this configuration).
Note
See Certificate authority configuration for details about how to configure w3af’s
certificate authority (CA) in your browser.
Wizards
The wizard is a collection of easy questions that you need to answer, and using all this information, the system will generate a Profile for you. Easy as that.
When you click on the Wizard button in the toolbar, or choose the same option in the Help menu, a new pop up window will appear.
This first window will just let you choose which Wizard you want to run. Choose one, and click on the Run the wizard button.
After this initial window, you’ll be presented all the questions that need to answer to feed the wizard. In each window you’ll have a description of the needed information, one or more questions or fields to fill, and the Back and Next buttons.
You can go back and forward through all the wizard, but at the very end you’ll want the Wizard to execute its magic, and generate the profile for you. For this, in the last window you’ll have two fields: the name and the description of the new profile. Fill them, click on the Save button, and that’s all: you have a new profile in the system.